Wednesday, October 23, 2024

CHURRO CUPCAKES


Yesterday we celebrated our church's 49th anniversary. We had a big potluck after the morning service. Whenever we have a big dinner on the grounds, I like to host some sort of baking challenge. We've done Apple bake-off, pumpkin bake-off, Chocolate challenge, and now the Cupcake challenge! The winner of the challenge was actually my daughter, Hannah! She made the most scrumptious little Raspberry, lemonade cupcakes! I even voted for them! I'll have to see if I can get her to post her recipe on here too. I chose the Churro cupcake because I wanted to do something different. These were DEElicious!! It seems like a lot of steps, but it was well worth it!! 


CHURRO CUPCAKES

(For the cupcake part)

1 yellow butter cake mix
3 eggs
1 cup milk
1 stick butter
1 tsp vanilla
1 1/2 tsp cinnamon

Preheat oven to 350.
In mixing bowl, combine yellow butter cake mix, eggs, milk, butter, vanilla & cinnamon, Beat on med - high until thick and creamy. Line your muffin pans with muffin papers. Using a No. 20 scoop, fill each muffin paper with batter. Bake at 350 for 15 - 18 minutes. Remove to wire racks to cool. When they are cool, poke a deep hole in the center with the handle of a wooden spoon.
Fill the cupcakes with the caramel mixture. Ice them with the cinnamon buttercream. Top each one with the churro and then drizzle with the caramel sauce. 


(For the Caramel filling and drizzle - Directions below)

1 can sweetened condensed milk

(For the icing)

1 cup (2 sticks) unsalted butter, room temperature

6 to 8 cups confectioners' sugar                                                                                                

½ cup milk                                                                                                                           

1 teaspoon pure vanilla extract

1 tsp cinnamon                                                                                                                                         

 In mixer bowl, beat butter until creamy. Slowly add powdered sugar a little at a time, alternating with the milk. Add in vanilla and cinnamon and let it mix for a few minutes, scraping down sides every so often, until all of the ingredients are well combined. Set aside until ready to assemble the cupcakes.


(For the Churros)

  • ¾ cup plain flour 
  • ¾ cup self-raising flour 
  • 1/2 cup unsalted butter 
  • 1 tbsp white sugar, plus extra, to sprinkle 
  • 2 egg yolks 
  • ground cinnamon, to dust 
  • ¾ cup dulce de leche or canned caramel filling 
  • vegetable oil, to deep-fry
Sift the flours together into a bowl. Place butter and 1½ cups water in a saucepan over medium heat and stir until butter melts. Add sugar and a pinch of salt, bring to a boil and stir to dissolve sugar. Add combined flours and stir briskly with a wooden spoon for 2 minutes or until the dough is smooth and comes away from the side of the pan. Transfer dough to a bowl, cool slightly, then stir in egg yolks until well combined. Transfer to a piping bag with a 15 mm star nozzle, then seal the bag with string or elastic to prevent the dough drying out. Refrigerate for 1 hour.

Meanwhile, combine cinnamon and extra sugar in a large bowl and set aside until needed.

Spoon the dulce de leche or caramel into a second piping bag and cut a small hole in the corner.

Fill a deep-fryer or large pan one-third full with oil and heat over medium heat to 170°C (or until a cube of bread turns golden in 30 seconds). Line a tray with baking paper and pipe 12 cm lengths of dough onto the tray. Working in 2 or 3 batches, gently drop dough into oil and deep-fry, turning halfway, for 4 minutes or until crisp, golden and cooked through. Remove with a slotted spoon and drain on paper towel.

Using a sharp knife, make a lengthwise incision along each churros, taking care not to cut all the way through. Carefully pipe dulce de leche into the incision from one end to the other, taking care not to split the churros.

Toss churros in cinnamon mixture. Let cool on paper towels for 10 minutes or so. Carefully slice into smaller sections just big enough to top your cupcakes. Set aside until you are ready to assemble your cupcakes.


For the Caramel 

In a deep pot, place one can of sweetened condensed milk. Fill pot with hot water, making sure can is totally submerged. Place on stove and heat to boiling. Once it boils, reduce heat to med-high. Continue to cook for 3 hours. Checking periodically to make sure can is still covered with water. Add more hot water as necessary until the 3 hours has elapsed. Remove from heat. Let pan sit until completely cool. Can must also be cool. Once can is cool, open and spoon contents into bowl. Be sure to scrape out the bottom of the can real good, because you need to get it all mixed together. With a sturdy spoon, stir caramel until it is completely combined. Voila! Best caramel ever! 
You could also buy store bought caramel sauce, but if you want the WOW factor, this homemade version is the way to go!


Cream of Mushroom Soup


Homemade "cream of..." soups are not as daunting as they may seem. They just start with a roux. If you've learned how to make one successfully, then you'll master these cream soups with no problem!  And the taste! There is no comparison between a bowl of hot, delicious, homemade soup and a can of store bought soup. I originally prepared this to make a batch of chicken with a creamy mushroom sauce. But when I tasted it, I thought, "Wow! I could literally eat a bowl of this with some warm, crusty bread!" I promise, you won't be disappointed! 

HOMEMADE CREAM OF MUSHROOM SOUP.

  • 3 tablespoons unsalted butter
  • 2 garlic cloves, minced
  • 1 shallot, finely chopped
  • 4 ounces Crimini mushrooms, chopped
  • 4 ounces white button mushrooms, chopped
  • 2 tablespoons all-purpose flour
  • 3 cups chicken stock
  • ¼ teaspoon fine sea salt, or to taste
  • ¼ teaspoon ground black pepper, or to taste
  • 1/2 cup heavy whipping cream
  • Garnish: Additional sliced mushrooms, chopped parsley 
  • DIRECTIONS:
  • Melt 2 tablespoons of the butter in a large pot, over medium-high heat. Add the garlic and shallot, cook for 1 minute, until they begin to soften. Add the mushrooms and cook for about 3 minutes, until tender and browned. Transfer all the contents of the pot to a bowl.
  • Add the remaining 1 tablespoon of butter to the pot. Once melted, sprinkle in the flour and whisk it quickly into a paste. Reduce the heat to medium. Add the stock a little at a time, whisking out the lumps between each addition.
  • Increase the heat back to medium-high and allow the soup to simmer well for 3 minutes. Add the mushrooms back to the pot and continue to cook for 2 more minutes. The stock will thicken slightly to be somewhat creamy. Slowly drizzle in the heavy whipping cream. 
  • Let cook for 3 to 4 minutes, then ladle into bowls. Garnish with mushrooms and parsley, if desired. This soup is delicious all by itself or when used as a sauce for pan fried chicken or pork chops. 

Monday, April 29, 2024

HOT FUDGE SAUCE


I have made this hot fudge sauce so many times over the years that I'm pretty sure I could do it blindfolded and with one hand tied behind my back! What I love about this sauce is that it is so reminiscent of my mothers old fashioned Hershey's chocolate fudge, but in a liquid form! This stuff is so very good! Usually when I make it, I will pour the leftovers into small mason jars to pass along to someone else as a treat. I've given it out as Christmas gifts many times as well. It goes together in a snap. If you are having last minute company and need a fast dessert to pull out - this is it! And if you are prone to baking, you probably already have the ingredients in  your pantry to make it. I warn you though, it's addicting! Whip this up the next time your family is over for dinner and you'll have them begging you to make more! And I dare you not to lick the spoon after you've stirred it! 

HOT FUDGE SAUCE

1 stick butter

6 Tablespoons cocoa powder

pinch of salt

1 cup white sugar

6 ounces evaporated milk

1 teaspoon vanilla

DIRECTIONS

Combine butter, cocoa powder, salt, sugar, and evaporated milk in medium saucepan over med heat. Still until well combined. Bring to a boil and cook for 3 minutes, stirring constantly. Remove from heat and stir in vanilla. Blend with immersion blender or give it a whir in your stand blender for a minute or two (don't skip this step! It will give you a silky smooth texture to your sauce!) Pour into your serving container and serve immediately, while it's still piping hot, over GOOD ice cream - like Blue Bell. Have the recipe ready to share. 

ENJOY! Have a sunshiny day! 😊


Friday, November 19, 2021

RAO'S TOMATO SOUP HACK w/ Jalapeno Popper Chaffles


Mmm! Don't you just love a hot bowl of soup on a chilly, Fall night? Especially if it's something you can whip up in a flash?! Then you'll love this one!

After a very long absence from my blog, I've decided to pop back on and try to breathe life back into it. My life has become horrendously busy since I began this lowly little blog. 

In Dec of 2021, my husband and I will celebrate 41 years of marriage! Our son and his wife Monica have been missionaries to the country of Ireland since 2013 (nearly 8 years now) and we have 12 grandchildren (as well as 5 waiting on us in Heaven). Both of our daughters, married preachers and their husbands are on staff here at out church. One is our Assistant Pastor and the other is our Youth Pastor. I don't take that blessing for granted. I am a blessed woman. We serve in a very busy ministry. I teach a weekly, online, ladies Bible study, on YouTube every week (if you search Starr Tharp on YouTube, it should pop up). I teach Sunday school to 3-6 grade girls. I sing in the choir. I help in our addictions ministry. I am also the church secretary. I have a lot of irons in the fire.  I bake and sell Cinnamon rolls during the holidays for those that desire to purchase them. The other day my daughter was visiting and she brought coffee and a couple of Cinnabon cinnamon rolls with extra icing, for us to share. I enjoyed the coffee fully, but I only enjoyed a few bites of the roll. It didn't taste as good as I remembered them. I used to really like them, but somewhere along the way of "big business" it has lost it's flavor. You just can't go wrong with good, homemade baking & cooking! Life is too short to eat a flavorless cinnamon roll! 

Even though life has gotten so busy, I have never lost my love of cooking. This blog started out as a hobby for me, really. Then the world EXPLODED with FOODIES everywhere! All of a sudden food prep became an art and a science. And everybody was a professional, not only in food prep but in photography! I didn't feel qualified to run with the "big dogs" so I kind of bowed out for a long time. Interestingly enough though, it didn't take long in experimenting with Pinterest recipes, to realize not everybody that says they know how to cook, really does! Think "Pinterest Fails!" Recently I was digging for a recipe that is a family favorite. I knew it was on my blog, and while looking through all the recipes I've posted, it renewed my desire to start posting again. 

I follow the Keto Twins on YouTube and recently they featured the Rao's Tomato soup hack. It sounded feasible, easy and delicious. I was dining solo tonight, and feeling especially FAT with the impending holidays, and decided I'd lighten up on my dinner choice for this evening. I had a jar of Rao's marinara in the pantry, and chicken base and heavy whipping cream in the fridge. I had also picked up a few jalapeno peppers at the market while I was out this afternoon. I had everything I needed! 

What a super simple, quick meal! If you are short on time with meal prep, you simply must give this a try! Also if  you love tomato soup & grilled cheese but neither are on your low carb diet, you simply must give this a try! I believe you'll be as pleasantly surprised as I was!

I was too hungry to wait and figure the carb count on this. But I know, Rao's is 5 carbs per 1/2 cup. You dilute it 1:1 with chicken broth, and then add heavy whipping cream. Correct me if I'm wrong, but I believe that would drop the carb count to less than half that amount, since chicken broth is technically 0 carbs, and there are only about 1.5 carbs in 1/2 cup of HWC. I'll definitely make this again and at that time, I'll be a little more focused on the carb count. Until then, I'm going to relish in my newfound, quick and easy, keto, low carb (and cozy) new menu item!  


RAO'S TOMATO SOUP HACK w/ Jalapeno Popper Chaffles

1 (24 oz) jar Rao's Homemade Marinara

1 cup prepared chicken broth (I use "Better than Bouillon" Roasted chicken base - it's 1 cup hot water to 1 tsp chicken base)

1/2 cup Heavy whipping cream

Fresh (or freeze dried) Basil, optional

DIRECTIONS:

Pour entire jar of Rao's marinara into a medium saucepan, add in chicken broth and stir to combine. Heat over medium, until it reaches a low boil. Turn heat down to low and simmer for several minutes, or until you are ready to eat. At this point, if you find it too chunky, you can use an immersion blender to smooth it out. Remove from heat and stir in heavy whipping cream and basil. If the cream cools the soup down too much, just pop the pan back onto the burner for a few minutes to get it back to a simmering heat. Serve piping hot with Jalapeno Popper Chaffles. (recipe below)


JALAPENO POPPER CHAFFLES

1 egg, beaten

1/2 cup shredded cheddar cheese

1 oz. cream cheese, softened

1 Tblsp almond flour

2 Tblsp cooked, crumbled bacon

1/2 Tblsp (or more if desired) finely diced, Jalapeno peppers (seeds removed)

Dash of garlic powder

DIRECTIONS:

Heat your mini dash waffle maker. In a small bowl, whisk the egg and add in remaining ingredients. Mix well to combine. Spray your waffle maker with non stick cooking spray. Spoon 1/4 - 1/3 cup of mixture onto waffle iron. This recipe normally makes 2 chaffles, but I got 3 out of my batter. Close the lid and cook for 3 minutes. Repeat until all the batter is used. I spread a little butter over mine when it came out of the waffle iron. But you could also spread cream cheese over these too, for a yummy treat! 

Enjoy! 

Look for someone to be a blessing to today! 😊💓


Monday, January 30, 2017

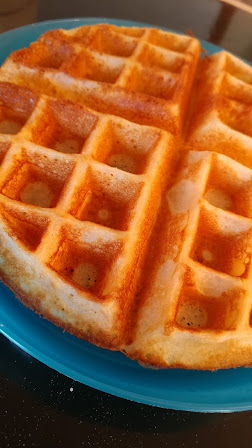
YEAST RAISED WAFFLES


If you have never tried a yeast raised waffle, you are missing out on a real treat! If your idea of a "good" waffle is "Waffle House" you are still missing out, I have made waffles for years for my family, Just recently though I came across the yeast raised waffle. Let me tell you, it is a game changer! I will NEVER make my old waffle recipe again! This one is THAT good! It is light and fluffy on the inside and mildly crispy on the outside. The perfect combo to stand up to that melty butter and warm syrup that you'll drizzle over it! Put this one on your "to make" list this week! You won't be sorry that you did!

YEAST RAISED WAFFLES
Yield: 8 waffles
Marion Cunningham’s Raised Waffles
From The Breakfast Book
½ cup warm water
1 package (2 ¼ tsp.) dry yeast
2 cups whole milk, warmed
1 stick (½ cup) butter, melted and cooled slightly
1 tsp. table salt
1 tsp. sugar
2 cups all-purpose flour
2 large eggs, lightly beaten
¼ tsp. baking soda
1 tsp. vanilla
Pour the water into a large mixing bowl.   Sprinkle the yeast over the water, and let stand to dissolve for 5 minutes.
Add the milk, butter, salt, sugar, and flour, and beat until well blended and smooth. Cover the bowl with plastic wrap, and let it stand 30 to 40 minutes at room temperature.
Pre-heat your waffle maker,  Spray waffle iron with cooking spray.
Just before cooking the waffles, add the eggs and baking soda and vanilla and stir to mix well. The batter will be very thin.  I did about a ladle and a half for each waffle and I had full waffles each time.  
Cook 2 to 3 minutes or until lightly browned and crispy. Remove from waffle iron and serve immediately with softened butter and warm maple syrup.
*These keep well in the freezer and after a few minutes in the toaster oven, they taste like you just made them! 

Friday, October 30, 2015

OLD FASHIONED POTATO SOUP


Fall! I love it! When the temps start dipping down into the 50's and the leaves on the maple trees begin to turn bright orange. Mmm! My favorite time of year. What is it about Fall that makes us homemakers want to spend more time in the kitchen, baking goodies and simmering pots of delicious soup? It's crazy how that happens! I haven't had a good bowl of homemade potato soup in SO long. Tonight the hubs was traveling out of town to preach. I was going to accompany him, but since we just returned home from a lengthy trip (800 miles) he insisted that I stay put and relax a bit. I adore that man! With him gone and me dining solo for dinner, hot soup sounded perfect! And what goes better with soup than a sandwich? I chose grilled cheddar/provolone but good ol' PBJ pairs perfect with this soup too! This soup is no muss, no fuss, no fancy ingredients. Just homey, cozy, feel good, potato soup like Grandma used to make!
 
OLD FASHIONED POTATO SOUP
 
1/2 stick butter
1/2 medium onion, diced
1 clove garlic, minced
1/2 cup flour
4 cups chicken broth
6 medium potatoes, diced
2 cups whole milk
1 (8 oz) bag shredded, cheddar cheese
Salt and pepper to taste
Sour cream (optional)
 
In medium saucepan over med high heat, melt butter. Add diced onion and minced garlic. Stir until onion is soft and translucent. Add flour and stir for 2 or 3 minutes. Add chicken broth, stirring constantly until it thickens a bit. Add potatoes and milk and cook for at least 10 minutes or until potatoes are tender. Remove from heat and add shredded cheddar. Stir until cheese is melted and blended into the soup. Season with salt and pepper.
Garnish with additional shredded cheddar and sour cream, if desired.
Serve with a toasted cheese or PBJ sandwich. ENJOY!
 

Friday, August 7, 2015

PEANUT BUTTER PIE


We just ended our Summer Revival Meetings with The Tharp Brothers (Hubby & his brothers!) It was a TREMENDOUS meeting! I love my brother's in law. All 3 of these men are wonderful, Godly men, full of the Holy Ghost. Every time they come here to MO, they are such a blessing to us. Every year they look for something to do for us. This year just before they came, my washer AND dryer BOTH went capoot! Almost simultaneously! I felt awful about it. But appliance repairs just weren't in the budget, just yet. Especially TWO of them! I just made sure to have everything washed up at the Laundromat before they got here. But they, many times will throw their shirts or other personal laundry in while they are here. Well wouldn't you know on their last day here (which is supposed to be a "down" day of relaxing) they get up early and mow the lawn and then they tear into my machines! They fixed the washer! Hallelujah! But the dryer was beyond help. :-( But PTL for Craig's List! Hubby found a nice, very affordable, Kenmore gas dryer on there and now I'm back in business!
Since they are always such a blessing to us, I wanted to make sure to have some of their favorite things while they were here. My brother in law, Russ's favorite pie is Peanut Butter. So this one was for him!
There are at least 3 major variations on Peanut Butter pie. There is the pudding one, the cream cheese one and the chiffon one (made with unflavored gelatin). This the cream cheese one.  I think it has the best texture and balance of peanut butter flavor. I didn't get fancy enough to snap a pic of it garnished. But it's a REAL keeper! Goes together in a snap too!
Tomorrow I'll post my other brother in law's favorite pie: Coconut cream!

PEANUT BUTTER PIE
                                                                                                                                                                                                                                                                                              
  • 1 (8 ounce) package cream cheese
  • 1 cup confectioners' sugar
  • 1 cup Jif creamy peanut butter
  • 13 cup milk
  • 8 ounces Cool Whip  or 2 - 3cups of fresh whipped cream
  • 1 graham cracker pie crust or 1 chocolate crumb crust or 1 baked pie shell.

Directions

  1. Mix all ingredients together and place in pie shell.
  2. Chill for at least an hour before serving.
  3. Can also be frozen.
  4. If desired, garnish with additional whipped topping, drizzle with chocolate syrup, sprinkle with peanuts or crushed peanut butter cups.

Tuesday, March 24, 2015

SHRIMP AND GRITS


My daughter, Hannah has been telling me for several months now that she and her family like shrimp and grits and that I should try making it. I'm not a Southern gal. I was raised in Northern Indiana and then spent 30 years in MI. So up til now I had not had the opportunity to try it. It's definitely not a Northern dish! But let me tell you... this recipe packs a wallop of flavor! I think I would move it right up into the ranks of my top 10 favorites! I love shrimp anyway. And this just made me love it even more! Most of the recipes I read for this dish sounded quite bland - even those on the websites of popular TV chefs. But adding just the right spice to it, did the trick! If you like shrimp, you should put this on your menu for next week! It went together in a snap! I also don't use the regular white grits, but opted instead for polenta (yellow grits). Very yummy dish! And even better - hubby gave it a thumbs up! Not sure if it was because of the bacon that's added into the dish, but either way, he made me a happy woman! This one's going in the "keep" file!

SHRIMP AND GRITS

For the grits portion, I used my creamy polenta recipe that is featured on my blog in other places.

CREAMY POLENTA
1 1/2 cups low fat milk
1/2 tsp salt
1/4 tsp black pepper
1 (14 oz) can fat free, low sodium chicken broth
1 cup instant dry polenta
1/4 cup preshredded Parmesan, romano, asiago cheese blend (or just parmesan works too)
1/2 cup shredded, medium cheddar cheese
4 Tblsp butter


Bring first 4 ingredients to a boil in a med saucepan. Reduce heat to low and slowly add polenta, stirring constantly with a whisk, to prevent lumps. Cook 3 minutes or until thick, stirring frequently. Remove from heat and add parmesan, cheese blend and butter, stirring until cheese melts. Serve immediately. If it seems to thick, add a little more milk. It should be the consistency of creamy mashed potatoes. Yield: 8 servings (1/2 cup). Keep warm while you prepare the shrimp.

FOR THE GRITS PORTION

  • 1 pound shrimp, peeled and deveined
  •  1 tsp Slap yer Momma seasoning (could also sub old bay, or your favorite Cajun seasoning)
  • 6 slices bacon, chopped (I cut mine with my kitchen shears)
  • 2 tablespoons chopped parsley
  • 1 cup thinly sliced green onions
  • 1 large clove garlic, minced
  •  
    Rinse shrimp and pat dry. Fry the bacon in a large skillet until browned; with slotted spoon, remove bacon to a separate bowl. In bacon fat that remains in skillet, add shrimp. Season with Slap yer Momma. Cook until shrimp turns pink. Add chopped bacon, parsley, green onions and garlic. Saute for 3 minutes.
    Spoon grits into a serving bowl. Spoon shrimp mixture over top. (some say to stir the shrimp into the grits, but I think it presents nicer if you spoon it over the top) Serve immediately.
    BLESSINGS!


    Tuesday, March 17, 2015

    GRANDPA'S OATMEAL COOKIES


    These cookies are nostalgic to me. My Grandpa made THEE best oatmeal cookies I've ever had. I am 53 years old and I still remember with great fondness, the look, smell and taste of his oatmeal cookies. I don't believe he ever used a recipe. They were made with such love that he probably could have prepared them with his eyes closed and one arm tied behind his back. What made them EXTRA special to me, was when he was coming to the end of a batch, he would save out enough cookie dough to make a "giant" cookie, JUST FOR ME! His cookies were perfect. Moist and flavorful in the middle and just enough of a crispy edge to balance out the soft middle. I loved my Grandpa. He was a Naval war vet. He passed into Heaven when I was just a little girl in 1st grade. But he made a tremendous impact on me. As I grew older and became interested in cooking, I remembered his oatmeal cookies and asked my mother if she would share his recipe with me. Sadly she told me, "he took that recipe to the grave with him." That broke my heart. "BUT," she said, "I know what his secret ingredient was that made them so special. Mincemeat! So I began experimenting with various oatmeal cookie recipes and before too long - VOILA! My Grandpa's cookies! I was thrilled, to say the least! If you've never tried using mincemeat in your oatmeal cookies, you are missing out! Talk about depth of flavor and MOIST! You won't be sorry you added it!

    GRANDPA'S OATMEAL COOKIES

    2 sticks butter, softened
    1 1/2 cups brown sugar
    1/2 cup white sugar
    3 eggs
    1 tsp vanilla
    1 1/2 cups flour
    1 tsp salt
    1 tsp baking soda
    1 tsp baking powder
    3 cups quick cooking oats
    1 (9 oz) pkg Nonesuch condensed mincemeat

    Preheat oven to 350. Spray baking sheets liberally with cooking spray.
    In mixing bowl, cream together the butter, brown sugar and white sugar until light and fluffy. Beat in eggs and vanilla. Sift together flour, salt, baking soda and baking powder. Stir into creamed mixture. Stir in oats. Crumble mincemeat with your fingers and stir that in until combined. Drop by rounded teaspoonfuls, 2 inches apart, onto greased cookie sheets, Bake 8 - 10 minutes or until light golden brown. Remove from oven and cool on baking sheet for 5 minutes. Transfer cookies to cooling racks or foil sheets to finish cooling completely. Store in airtight container for up to a week.
    BLESSINGS!

    Monday, March 16, 2015

    PERFECT PEANUT BUTTER COOKIES


    Throw out everything you ever thought you knew about making Peanut butter cookies and memorize this recipe. It's the last one you'll ever need. These literally were the most PERFECT peanut butter cookies I've ever made! I detest a dry, crumbly, peanut butter cookie! It HAS to be moist to be able to savor that decadent peanut butter flavor you crave in this cookie. These don't have to be dunked, to be enjoyed! You can eat one all by itself and still be in heaven. Although a tall, cold glass of milk or a steaming, hot cup of Dunkin Donuts coffee are perfect compliments to this cookie. I'll NEVER use the "traditional" peanut butter cookie recipe, ever again. THIS one is IT for me!

    There are lots of tips and tricks that cookie bakers can share with you to get a "perfect" cookie. But for this one, my biggest tip for you is DON'T OVER-BAKE THEM! And don't skip the step where you coat them in sugar before baking.

    PERFECT PEANUT BUTTER COOKIES

    1 cup brown sugar (that's right, I said BROWN sugar!)
    1 stick butter, softened
    1/2 cup Jif peanut butter
    1 large egg
    1 tsp Vanilla extract
    1 1/2 cups all purpose flour
    1/2 tsp baking soda
    1/2 tsp salt
    2 Tblsp sugar or more, for coating cookie dough balls before baking

    Preheat oven to 350.
    In large mixing bowl, combine brown sugar, softened butter and peanut butter. Beat with mixer until light and fluffy. Add egg and vanilla and mix again until combined. Combine the flour, baking soda and salt and add to the cookie dough mixture. Stir again until combined.
    Using a small metal cookie scoop (or a spoon) measure out 1" cookie dough balls. If you don't have a cookie scoop, then just use a spoon to scoop the dough out. Use hands to roll the dough into balls. Roll each one in sugar and transfer to baking sheet. Place cookies 2" apart. Lightly press the tines of a dinner fork flat against each dough ball, creating an indentation. Then make another light indentation perpendicular to the first. Creating that classic "criss-cross" pattern that is so familiar on a peanut butter cookie.
    Bake until the cookies are a very light brown - 8 to 10 minutes. 8 minutes was the perfect time for my oven. Cook an additional 5 minutes on the baking sheet. Transfer cookies to sheet of foil to finish cooling. Repeat with remaining dough. Store baked cookies in airtight container for up to a week.
    BLESSINGS!


    DRESSED PORK CHOPS


    This super simple dinner dish is one of hubby's absolute favorites, because it is one that his Momma used to make when he was growing up. So it's for SURE an oldie! LOL But it truly is a goodie! 
    All you need to go along with this dish is a nice green salad and/or veggie, such as roasted asparagus. One thing I like about this recipe is you can use either pork chops or pork steaks with it (whichever is on sale that week!) The dressing baked on top of the chops gets a light crispy top but keeps the pork nice and moist on the bottom. And since you brown the chops before baking them, they don't take much longer in the oven. Which is nice if you still have "a to-do list" that you're chipping away at for the day! You can throw dinner in the oven and check a few more things off that list! Clean up is pretty easy too since you use so few dishes in preparing it.

    DRESSED PORK CHOPS

    6 bone in pork chops (not too thick) or pork steaks
    1 cup 1/2 & 1/2 or whole milk
    1 cup all purpose flour
    Salt
    Black pepper
    Garlic powder
    Lawry's seasoned salt
    Oil for frying
    1 (12 oz) pkg cubed stuffing mix (your favorite flavor)
    2 cups chicken broth
    1 stick butter (divided in half)

    In separate mixing bowl, place 1 (12 oz) pkg of cubed dressing mix. Melt 1/2 stick of butter and add to the the 2 cups of chicken broth. Pour the chicken broth & melted butter mixture over dressing in bowl and stir to combine. Set aside.

    Season chops with salt, pepper, garlic powder and Lawry's. Dip chops in milk and then coat both sides with flour. Heat oil in large skillet over med-high heat. When oil is hot, place as many chops in, as your skillet will reasonably hold (without cramming them). I like to fry only 2 or 3 at a time. Fry until a nice golden brown (about 4 - 5 minutes each side). 


    Place browned chops in baking pan, overlapping slightly if space is needed. 


    Top chops with all of the dressing from the bowl.


    Melt remaining 1/2 stick of butter and drizzle over dressing. Bake at 375 for 30 - 45 minutes, depending on thickness of chops, until chops are done and dressing is a nice, golden brown. 
    Serve with a nice steaming side of roasted asparagus!
    ENJOY! 


    Saturday, March 14, 2015

    CLASSIC BISCUITS


    OK I've made a lot of biscuits in my lifetime, but these really were THEE best I've ever made! And you can't go wrong baking on or in a Pampered Chef stone! Baking stones make any bread item bake up to perfection! And these biscuits didn't disappoint. Be sure to liberally brush the tops of these babies with butter as soon as they come out of the oven. Then watch in sheer delight as the melted butter slides down off the top, over the sides and onto the piping hot stone and FRIES the bottom of the biscuit to give it a crispy edge! Mmm! Makes me want to run into the kitchen right now and whip up a batch of fresh biscuits for absolutely no reason at all, other than to slather them with butter and homemade strawberry freezer jam! OK AND to eat them! :-)

    CLASSIC BISCUITS

    If you want your biscuits to turn out light and feathery, then handle the dough as little as possible. You're sure to get a nice flaky biscuit if you do it that way.

    • 2 cups all-purpose flour
    • 2 tsp. baking powder
    • 1⁄2 tsp. baking soda
    • 1 tsp. salt
    • 1 stick cold butter, diced into cubes
    • 2⁄3 cup milk
    Preheat oven to 450°F. 
    In a large bowl, sift together the flour, baking powder, baking soda and salt. With a pastry cutter, cut the cold butter into the flour until the mixture resembles coarse meal. Stir in the milk and blend w/ spoon just until all the liquid has been absorbed. With lightly floured hands, work the dough briefly until it barely holds together in a flaky ball. 
    Place the dough on a lightly floured work surface. Roll or pat the dough out into a round about 1⁄2 inch thick. With a 2-inch biscuit cutter, cut out as many rounds as possible. Gather up the scraps, reroll and cut out more rounds. Do not reroll the dough more than once or you will end up with tough biscuits.

    Transfer the biscuits to the baking stone and bake until golden brown, about 15 minutes. Serve immediately with real butter and homemade jam. Or top them with piping hot gravy! ENJOY! 

    BISCUITS W/ BACON GRAVY


    "First, you make a roux..."
    There's nothing quite so simple as breakfast for dinner! It's what most harried moms turn to when the dreaded question gets asked, "What's for dinner mom?" and they have no clue!
    I believe the test of a seasoned cook is whether she can make good gravy or not! LOL I suppose I'm teasing a bit, as there are a lot of good cooks out there who just cannot make good gravy. It really isn't as daunting as it seems though. As long as you can master making the roux without burning it. This has never been a problem for me, as the perfect color for a finished roux is the color of peanut butter - my all time favorite breakfast treat! I've looked at that color every morning of the world for nearly 53 years! It's emblazoned in my brain! If you are prone to dumping your "instant gravy" out of a jar or out of a bag and mixing it w/ water.... do yourself and your family a favor and learn to make homemade gravy! It will be the star of the show!
    Most of you are probably more familiar with sausage gravy than bacon gravy. I have never been a huge fan of sausage or sausage gravy. I grew up eating my mother's bacon gravy and it was the BEST!

    BACON GRAVY

    1 lb of good bacon - cut into bite size pieces (I use my kitchen scissors for this)
    1/4 cup of all purpose flour
    2 - 3 cups of milk (depending on how thick or thin you like your gravy)
    1 tsp salt
    1/2 tsp black pepper

    In large skillet or dutch oven, over med-high heat, fry cut up bacon until golden brown and lightly crisp. Remove pan from burner and with slotted spoon, removed bacon bits from the fat in the skillet. Leave bacon grease in skilllet. If it is very greasy bacon, you may want to pour a little bit of it off into a bowl. To the bacon fat in the skillet, add 1/4 cup of flour, 1 tsp salt and 1/2 tsp black pepper. Stir constantly with wooden spoon or whisk until flour is cooked through and begins to turn a medium golden brown (the color of peanut butter). Don't let your roux burn! Quickly add milk and whisk to prevent any lumps forming. Add in bacon bits. Let simmer until thickened, stirring occasionally to prevent clumping or sticking.  Taste test to add more salt and/or pepper. I season mine pretty heavily. Serve over warm biscuits w/ a side of tender, scrambled eggs! ENJOY!

    Here are a couple of good recipes for buttermilk biscuits or Classic biscuits.

    Saturday, September 27, 2014

    BLUEBERRY MUFFINS W/ STREUSEL TOPPING


    ALWAYS on the hunt for a good muffin recipe and this one didn't disappoint!! My muffin criteria: must be light, moist and flavorful! These scored high in every area. A definite keeper! We have a dear lady in our church who was just recently widowed (a week ago) when her husband was killed in a very tragic work accident. It has only been a week, so it is still very fresh to her. But bless her heart, there she was this morning, at Saturday morning prayer breakfast, as usual, serving her Lord and cooking for the ones she loves. And to top it off, today is her birthday! A very hard weekend for her, I'm sure. So last night, I stopped at the church and decorated the fellowship hall with some festive birthday decorations in honor of her special day. I wanted everything in place before she got there this morning, knowing she would arrive before me. I know it's not the same, but thought it might lighten the heaviness a bit for her. Then this morning, I got up early and whipped up these little beauties as a surprise birthday treat for her. The first batch I made were in Happy Birthday muffin cups and had Happy Birthday picks stuck in the top of them. Unfortunately I didn't get a pic of those. Saturday mornings are usually a whirl of activity to get ready to go. ESPECIALLY when our precious 2 year old grandson, Gideon, spends the night on Friday! :-) I mean we HAVE to have "MooMoo" (my Grandma name from the grandbabies) and Giddy cuddle time and do cheers with our coffee cups together, before we rush into the day! :-)

    BLUEBERRY MUFFINS

    Yield: 24 muffins

    3 cups all purpose flour
    1 cup sugar
    3 teaspoons baking powder
    1/2 teaspoon baking soda
    1 tsp. cinnamon
    1/2 tsp. nutmeg
    1/4 tsp salt
    1/2 cup butter, melted
    3/4 cup whole milk
    3/4 cup sour cream
    1/2 cup unsweetened applesauce
    1 tsp vanilla
    1 1/2 to 2 cups fresh or frozen blueberries
    Streusel toppping (recipe follows)

    Preheat oven to 400 degrees. In a small bowl, prepare Streusel topping and set aside. A pampered chef, stone muffin pan works best for these, but if you don't have one, a metal one works just fine too. Fill muffin wells with paper liners. Lightly spray liners with cooking spray and set aside.
    In a large mixing bowl, stir together flour, sugar, baking powder, baking soda and salt.
    In a small mixing bowl, melt 1 stick of butter, and add remaining wet ingredients: milk, sour cream, applesauce and vanilla. Whisk to combine. Add wet ingredients to dry ingredients, stirring just until combined. Do not overmix your batter, or your muffins will be tough. Gently fold in fresh or frozen blueberries.
    Divide batter evenly among prepared muffin cups. Sprinkle evenly with streusel topping.
    Bake at 400 degrees for 5 minutes. Turn oven down to 350 and bake an additional 12 - 15 minutes or until a wooden pick inserted in center comes out clean.
    Remove from pans and let cool on wire racks (if you can wait that long!) :-)

    STREUSEL TOPPING

    1/2 cup all purpose flour
    1/2 cup sugar
    1 tsp cinnamon
    3 Tblsp butter, softened

    In a small bowl, combine flour, sugar, cinnamon and butter. Mash with fork or pastry blender until well combined and mixture is crumbly.

    Wednesday, August 14, 2013

    SNICKER'S SALAD


    One bite of this delicious apple creation and you'll wonder why it's called a "salad!"  But.... mine is not to question why. :-) All I know, is every time I take this dish to a potluck or make it for company, it is one of the first things to be devoured! Everyone asks for the recipe. It's so simple, you could make it with your eyes closed and one arm tied behind your back!

    SNICKER'S SALAD

    6 Apples (your choice - but some prefer Granny Smith. I am not a tart apple fan, so I use Gala)
    6 Snicker's candy bars, chopped into bite size pieces
    2 bricks cream cheese, softened
    2 (8 oz) Cool Whip, thawed
    1 cup sugar

    With mixer, cream softened cream cheese w/ sugar. Stir in Cool whip and mix until combined.  
    Cut UNpeeled apples into 8 wedges and remove core. Dice each wedge into 4 or 5 bite size pieces. Add apples & Snickers pieces to cream cheese mixture. Fold all together until it is well combined.
    Chill until ready to serve. Have several copies of recipe ready to hand out!

    Friday, May 17, 2013

    STRAWBERRY FREEZER JAM

    It's that time of year again! Strawberry season is upon us! For you folks in the cold North, you still have another month to wait for berries! Someone gave me a bunch of "leftover" berries the other day and it was so many that my first thought was to make freezer jam with them! I ended up making 20 (1/2 pint) containers and still had enough left over to make a batch of strawberry shortcake! WooHoo!
    Strawberry freezer jam is so quick and easy to make! And makes such a nice gift when you pair it w/ a loaf of homemade bread or biscuits. To make preparing the berries quicker, I chop mine in my food processor. But you could mash your berries with a potato masher or just mash them with your hands even. At any rate, any work that goes into making the jam is WELL worth the effort!

    STRAWBERRY FREEZER JAM

    2 cups  crushed strawberries (buy 1 qt. fully ripe strawberries)
    4 cups  sugar, measured into separate bowl
    3/4 cup  water
    1 pkg.  SURE-JELL Fruit Pectin
     
    RINSE 5 (1-cup) plastic containers and lids with boiling water. Dry thoroughly. Discard stems. Crush strawberries thoroughly, 1 cup at a time. Measure exactly 2 cups prepared fruit into large bowl. Stir in sugar. Let stand 10 min., stirring occasionally.  
     
    MIX water and pectin in small saucepan. Bring to boil on high heat, stirring constantly. Continue boiling and stirring 1 min. Add to fruit mixture; stir 3 min. or until most the sugar is dissolved. (A few sugar crystals may remain.)
     
    FILL containers immediately to within 1/2 inch of tops. Wipe off top edges of containers; immediately cover with lids. Let stand at room temperature 24 hours. Jam is now ready to use. Store in refrigerator up to 3 weeks or in freezer up to 1 year. (If frozen, thaw in refrigerator before using.)
     
    *I'm still trying to master the low sugar version. I made both kinds yesterday. The regular one set up quite nicely but the low sugar one did not. I'm working on fixing it and figuring out what I did wrong. 
    If I can't fix it, I'll have 8 jars of ice cream topping to give away as gifts! When life hands you runny jam, make ice cream sundaes!  :-)   

    Saturday, April 13, 2013

    FAVORITE SCOOP


    Cupcakes are all the rage right now, aren't they?! I don't know about you, but I find it annoying to try to fill the muffin papers with a spoon. You never know how much batter to put on the spoon and once you get all the papers filled, you go back through adding to each one, to make them all the same size. At least that's what I used to do! I'm a bit anal that way! haha When I started cooking for Summer Camp I discovered the joy of using measured scoops!! It was exactly what a CDO (that's OCD, except the letters are in order like they should be!) person like me needed!


    This No. 20 scoop - 1 5/8 oz (if you scoop your cupcake batter out in even scoops) makes exactly 24 cupcakes, all perfectly the same size! There! Now isn't that better?! :-)

    Friday, April 12, 2013

    BANANA CINNAMON WAFFLES (Low Carb-GF)

    Breakfast can be a real challenge when you are trying to eat Low Carb - GF. I try to rotate different meals so we aren't just eating eggs every morning. For a while now I have been making Cream cheese waffles that, if I remember right, have roughly 2 carbs each. These have a few more, but are still only 6 carbs each. I have been seeing this recipe all over Pinterest and decided to give them a try this morning. It received a thumbs up from hubby so that's all I needed to add them to my blog. I keep over ripe bananas in my freezer, and just popped a couple in the microwave to thaw, so this went together super quick and easy!

    BANANA CINNAMON WAFFLES
    Yield: 2 waffles

    1 over ripe banana
    2 large eggs
    1 tsp cinnamon
    1 tsp vanilla
    1 tsp baking powder
    2 tsp Splenda (optional)

    Heat waffle iron until your light says it's ready.
    The easiest way to mix this up is to throw everything in a food processor or blender. Start by adding eggs and banana to the processor, blend until thoroughly combined. Add in remaining ingredients and give it another whirl until it's smooth and creamy.
    Spritz hot waffle iron w/ Pam cooking spray. Add half of the batter to the hot iron and close cover. Cook for 2 - 3 minutes or until medium golden brown. Remove and drizzle with melted butter.

    6 carbs each

    Thursday, April 11, 2013

    FLOURLESS PEANUT BUTTER COOKIES

    Here I am again, still on the quest to get hubby off his insulin. The apple fritters were a brain freeze. I didn't technically make them for home, but to take to a new family that had visited. But anytime there is any baking going on, hubby seems to sniff it out! :-) So I will be a good girl and bake things that 'if' he does come sniffing, and he will, the thing he devours, won't serve to kill him! Recently I tried a flourless chocolate cookie for the first time. I was pleasantly surprised! So I thought if that was so good, then I wonder if there is a flourless version of the good ol' PB cookie and voila! Didn't take much searching to find one! I did not have Sucanat on hand (have actually never used it) but I did have bulk Splenda, so I used that. Personally when I make these again, if I use Splenda again, I will knock the amount down to 1/2 cup rather than 3/4. They were amazingly tasty though. It's crazy how you can still make these yummy little treats w/out flour or sugar! Who knew? :-)

    FLOURLESS PEANUT BUTTER COOKIE
    (Low Carb - Gluten Free)

    3/4 cup Sucanat (if using bulk Splenda, reduce that to 1/2 cup)
    1 large egg
    1 tsp vanilla
    1 cup smooth peanut butter
    1 tsp baking soda

    Preheat oven to 350 degrees. Line a cookie sheet with parchment paper. (I used my PC stone sheet pan, so didn't need the parchment paper).
    Place sucanat, egg and vanilla in mixing bowl and mix well until smooth. Add in peanut butter and baking soda and mix until combined.
    Using a small cookie scoop, scoop up dough and drop on cookie sheet. I put 8 on each pan so they would have room to bake and not run into each other and it was plenty of space. Roll each ball with your hands, and flatten slightly with the tines of a fork, in two directions, giving it the classic " Plaid PB cookie design."
    Bake for 8 - 10 minutes or until desired doneness. I baked mine for exactly 8 minutes and when I removed the pan from the oven, I left the cookies on the stone for another 5 minutes before I removed them to my sheet of foil to cool completely.

    Optional: If you want to make them PBJ thumbprint cookies, roll dough into balls, do not flatten with fork, but instead make slight indentation with thumb. Fill with about 1/2 tsp sugar free jam and bake as directed above.

    Yield: 16 cookies

    As best I could figure, these were 4 carbs per cookie

    Tuesday, March 26, 2013

    APPLE FRITTERS


    Whenever we have a new family visit in a church service, hubby and I make a visit to their home and I take a homemade treat to them. This time I decided to try my hand at apple fritters. It was a super easy recipe to mix together and they were DEElicious! I had to make my family members all "cup bearers" the night before as I fried up a trial batch. (I know..... poor things! They live such sacrificial lives!) I was being overly cautious about the fry time in the cast iron pot, as I didn't want to burn them. The first batch came out looking all lovely and golden brown. We quickly dunked them in the glaze and with mouths watering, we dug in, only to have them OOZE out their uncooked middles all over the plate! :-) Glad it was the "trial" batch! 2nd batch I fried a couple minutes longer. We all stood around the stove watching them sizzle in the hot oil and magically flip themselves over when one side was done! Once I got the knack of it down, I flew right through the whole batch. I could fry up about a dozen at a time. I'm planning on making these for prayer breakfast this weekend. I'm thinking they'll go over fantabulously!

    APPLE FRITTERS

    1 heaping cup all purpose flour
    1/3 cup sugar
    1 tsp. baking powder
    dash salt
    2 tsp. cinnamon
    1/4 tsp. nutmeg
    1/2 tsp. vanilla
    1 T. butter, melted
    1 egg
    1/3 cup milk + plus more if needed
    1 – 1 1/2 cups diced apple (your favorite kind)

    oil for frying

    milk and powdered sugar glaze for dipping or just powdered sugar for dusting
    1 cup powdered sugar
    1 T 1/2 & 1/2 (or milk)
    1 tsp vanilla

    Mix all dry ingredients together, slowly add the wet ingredients minus the apple. Carefully mix until well combined. Gently fold in apple pieces. The batter should be the consistency of a light cake mix. Heat oil in cast iron pot over Medium to Medium high heat. Perfect temp to fry donuts is 375. Once the oil is ready (I always test it by sticking the handle of my wooden spoon in the oil. If it sizzles, it is ready) then using a cookie scooper place balls of dough into the oil. Be careful not to overcrowd (my cast iron dutch oven easily held a dozen fritters) and watch carefully for the underside to turn golden brown, then gently flip over and continue frying until done. I cooked mine about 2 minutes per side, but they were the size of golf balls – adjust cooking times based on size of fritters and temperature of your oil.
    It's a good idea to do a trial run so you can gauge the temp of your oil and the fry time needed. Make your family or friends guinea pigs to taste test!
    ENJOY!